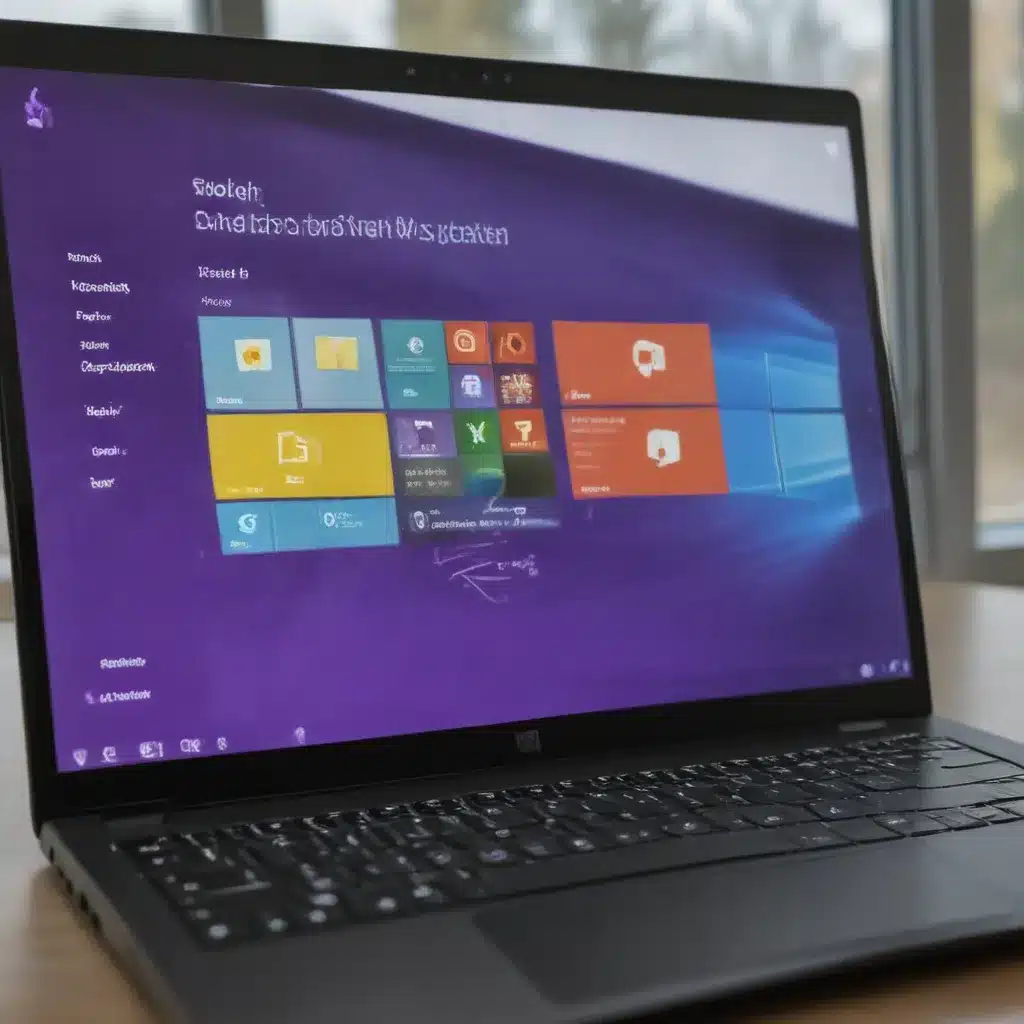
Windows 10 is a popular operating system used by many users worldwide. Its features and capabilities have become integral to many people’s lives. However, this success has not been without drawbacks; users have reported slow performance issues with the platform. This article will explore the causes of Windows 10 slow performance and provide potential solutions for improving it.
The issue of Windows 10 slow performance can be attributed to several factors. These include both hardware and software issues, as well as user-created problems. Hardware limitations may prevent the OS from running quickly and efficiently; alternatively, software settings may need adjustment to ensure optimal performance. Furthermore, user-created issues such as too many open applications or excessive clutter on the hard drive can also cause a slowdown in system speed.
For those users experiencing Windows 10 slow performance, there are several steps they can take to try and improve it. These include ensuring that their hardware components are up-to-date and compatible with the system requirements; adjusting their software settings to suit their needs; uninstalling unnecessary applications; using disk cleanup tools to remove clutter from the hard drive; and performing regular maintenance tasks such as defragmentation and antivirus scans. Users can ensure that their systems run as effectively and efficiently as possible by taking these steps.

Definition
Windows 10 is an operating system developed by Microsoft. Its slow performance can be a source of frustration for users, and the potential causes are numerous. To illustrate, the underlying hardware might not meet the system requirements to run Windows 10 efficiently. Moreover, outdated software or corrupt files may also contribute to slowdowns. Consequently, it is essential to identify the root cause to improve performance. This can range from increasing RAM or updating drivers and software to clearing out temporary files or resetting the operating system. By understanding these possibilities and taking steps to address them, users can ensure that their Windows 10 experience is as smooth as possible.
System Requirements
A clear understanding of the system requirements for Windows 10 is essential to ensure its optimal performance. This section will provide an overview of what hardware and software are necessary to use Windows 10 effectively.
The hardware component of Windows 10 includes both RAM and hard drive space. The minimum RAM requirement is 1GB, while the recommended amount is 2GB or more. For hard drive space, the minimum requirement is 16GB, and the recommended amount is 32GB or more. In addition, having a processor that meets the minimum standards is essential, which can be found on Microsoft’s website.
Finally, it is also essential to ensure that all software used with Windows 10 meets its current requirements. This means having updated antivirus software installed and running at all times. It also means being aware of any software updates available for programs already installed on your computer. Having up-to-date software helps improve system performance by eliminating bugs and other issues that could cause slowdowns in performance or crashes.
Now that we have gone over the system requirements for Windows 10, our next step will be looking at troubleshooting tips to help improve its performance.
Troubleshooting Tips
The average American computer user spends over 11 hours per week in front of the computer screen, so ensuring that a Windows 10 system is running at optimal performance is vital. One everyday problem users face slow performance, which several factors can cause. To improve the speed and stability of a Windows 10 system, there are a few essential troubleshooting tips that can be employed:
- Monitor what programs and applications are running in the background and close any that seem unnecessary.
- Regularly run anti-malware scans to guard against viruses, spyware, and other malicious software.
- Disable animations, effects, and visual styles for improved speed.
- Keep drivers up-to-date to ensure hardware compatibility with new software updates.
- Avoid resource-intensive activities such as gaming or streaming while running multiple programs simultaneously.
These simple steps can help increase your computer’s performance significantly. In addition to these essential troubleshooting tips, another helpful method of improving system performance is disk cleanup and defragmentation, which will be discussed in the following section.
Disk Cleanup And Defragmentation
Disk cleanup and defragmentation are essential for improving Windows 10’s performance. Disk Cleanup removes temporary files and other unnecessary data from the computer, freeing up space on the hard drive. This allows Windows 10 to access files faster, resulting in improved performance. Defragmentation rearranges files on the hard drive to store them more efficiently. This makes it easier for Windows 10 to find and access them, leading to a better overall experience.
It is recommended to run disk cleanup at least once a month and defragmentation about once every three months; however, users can adjust their schedule based on how frequently they use their computer. To run disk cleanup, users should go to “Settings > System > Storage” and select “Free up space now”. To run defragmentation, users should go to “Start > Type ‘Defragment and Optimize Drives’> Select the drive they want to defragment > Optimize”.
Users can improve their system performance by following these steps without any additional hardware or software purchases. With regular maintenance through disk cleanup and defragmentation, users can ensure their computer runs as efficiently as possible. The next step in improving Windows 10’s performance is registry cleanup.
Registry Cleanup
It has been suggested that an effective way to improve Windows 10’s slow performance is to clean up the system registry. A theory suggests that when there are corrupt or incorrect entries in the system registry, it can cause a decrease in computer speed and efficiency. To test this theory, one should examine how many errors appear in the system registry. If there are numerous errors, cleaning up the registry may be necessary.
Cleaning up the registry involves removing outdated and unnecessary files from it. This can be done using a utility program designed specifically for this purpose, such as CCleaner or Auslogics Registry Cleaner. These programs can scan through the entire registry and identify any problems causing a slowdown in performance. Once identified, these issues can be addressed and removed from the registry, thus improving overall computer speed and efficiency.
To ensure that all outdated and unused registry entries have been wholly removed, performing regular maintenance on the system registry is also recommended. This includes backing up your current settings before making any changes so that you can restore them if something goes wrong during the cleanup process. Additionally, it is essential to keep all of your software updated so that new versions of applications don’t overwrite existing files in the system registry, which could cause errors or slow down performance. By following these steps regularly, one can ensure that their Windows 10 PC runs as efficiently as possible while maintaining a healthy level of security on their device.
Having explored the theory behind cleaning up one’s system registry and some tips for performing regular maintenance, another step towards improving Windows 10’s slow performance is disabling unnecessary startup programs.
Disable Unnecessary Startup Programs
Startup programs are applications that start when a computer is powered on. These can be useful if they provide essential services such as antivirus protection, but many are unnecessary and have slow startup times. To improve the performance of Windows 10, these should be disabled.
The first step to disabling unnecessary startup programs is to identify them. This can be done through the Task Manager in the Start menu or by pressing Ctrl + Alt + Delete. Under the Startup tab, all running processes will appear with their ‘Startup Impact’ displayed. Those with a high impact should be disabled by clicking on them and selecting Disable from the context menu.
It can also prevent items from automatically starting up by changing settings in the software or its installation folder. For example, if a program is set to launch during boot-up, this can be changed in its preferences. It may also have the option to disable system services which will help prevent it from launching at startup without uninstalling it completely.
By following these steps, users can reduce their computer’s startup time and improve the overall performance of Windows 10.
Update Drivers And Software
As an adage goes, “a stitch in time saves nine”. When it comes to improving the performance of Windows 10, updating drivers and software is a great place to start. Outdated drivers can cause conflicts and slow down system performance. Ensuring that all system components are up-to-date with the latest versions is vital.
The first step is to update the device drivers. This can be done manually by visiting the manufacturer’s website and downloading the appropriate driver version or automatically using a driver updater tool. The second step is to update installed software applications such as Office, Adobe Acrobat Reader, etc. Most software programs have an automatic update feature, automatically downloading and installing updates. Finally, users should check for Windows Updates regularly and install any recommended updates that become available for improved security and stability.
In addition to enhancing system performance, keeping devices and applications updated also ensures protection from vulnerabilities that malicious actors can exploit for malicious purposes. All these steps combined will help improve Windows 10 performance significantly over time.
Delete Temporary Files
One way to improve the performance of Windows 10 is to delete temporary files. Temporary files are created due to a user’s activities, such as browsing the internet or using applications. They can accumulate over time and occupy a computer’s hard drive. This can cause the system to slow down and become unresponsive. Users should open the “Run” dialogue box to delete temporary files by pressing Windows + R keys simultaneously and then typing “%temp%.” This will display all temporary files currently stored on the hard drive. Users should select all the files listed and click “Delete” to remove them from the system.
Additionally, users may want to consider running disk cleanup utilities periodically to ensure that their computers remain free from unnecessary clutter. By cleaning out these unnecessary temporary files, users can help keep their systems running smoothly and efficiently. The next step in improving Windows 10’s performance is to disable visual effects.
Disable Visual Effects
An irony is an effective tool when considering Windows 10 slow performance. Ironically, Windows 10 comes with a variety of visual effects that are intended to enhance the user experience, yet they can often be a hindrance in terms of system performance. Disabling some or all of these visual effects can help improve overall system performance and may benefit users experiencing slow performance.
To begin, open the System Properties window by typing ‘System’ into the search bar at the bottom left corner. In this window, select ‘Advanced’ from the menu on the left-hand side. Next, click ‘Settings’ under ‘Performance’ and check the box next to ‘Adjust for best performance’. This will disable all non-essential visual effects, such as shadows and animations. Users can use this window to uncheck individual items related to different visual effects if more control is desired.
Finally, it is essential to note that disabling some or all of these visual effects may affect how specific applications look and operate. Therefore, it is recommended that users only disable what they feel necessary to improve their system’s performance without sacrificing too much in terms of visuals and usability. This will help ensure their overall experience remains positive while ensuring their computer runs smoothly. Increasing virtual memory should further improve Windows 10’s sluggish performance issues.
Increase Virtual Memory
Increasing the virtual memory of a computer system is an effective way to improve performance in Windows 10. Virtual memory allows the system to use hard disk space as RAM when the physical memory is insufficient. This helps reduce applications and programs’ lagging, freezing, and crashing when running multiple tasks simultaneously. Users should open the ‘My Computer’ icon on their desktop to increase virtual memory. Then they should select ‘Properties’ from the dropdown menu and click the ‘Advanced System Settings’ tab. Inside this tab, users can access the settings for Virtual Memory, which includes increasing or decreasing its size by allocating more hard disk space. Finally, users should save these changes and restart their computer system before they can experience improved performance.
To ensure that a user’s system remains stable with increased virtual memory settings, it is essential to update Windows OS regularly via Windows Update or manual downloads from Microsoft’s website. Doing so ensures that patches and security updates are installed correctly, helping protect against potential threats while optimising the system for peak performance.
Update Windows Os
Updating Windows OS is a cardinal component for improving slow performance. Keeping the system current with the newest operating system updates can enhance speed and efficiency while avoiding potential security issues. Alliteration alerts users that updating Windows OS is necessary; patching promptly prevents productivity pitfalls. There are several steps involved in this process, as outlined in the following table.
| Step | Description |
|---|---|
| 1 | Open Settings > Update & Security > Windows Update |
| 2 | Select ‘Check for Updates’ to check if any are available |
| 3 | If updates are available, select ‘Download and install now’ or ‘Install now’ to proceed with the installation of available updates |
| 4 | After installation, restart the computer for changes to take effect and apply installed updates properly. |
| 5 | Once restarted, recheck for additional updates and repeat steps 2-4 until the latest Windows OS updates have been installed. |
Though it may be time consuming, staying up-to-date with your operating system’s latest versions ensures optimal performance and security. Users who take advantage of these features can help keep their devices safe from malicious activity due to outdated software, which is more vulnerable to attack. They will also benefit from improved Windows speed and stability with new updates. Ensuring you have the latest version of Windows installed on your device provides a secure environment while boosting performance levels. With these simple steps completed, users can rest assured that their system performs at its best.
Check Antivirus Protection
The next step in improving Windows 10 slow performance is to check antivirus protection. Antivirus programs are designed to protect computers from malicious software and other threats. However, if an antivirus program runs inefficiently or is outdated, it can cause system-wide slowdowns or even crashes. For this reason, it is vital to make sure that the antivirus program installed on the computer is up-to-date and properly configured.
The first step in checking antivirus protection is ensuring no conflicting security applications are installed on the computer. Conflicting security applications can interfere with each other, slowing down the computer’s overall performance. Once any conflicts have been identified and resolved, it is time to check that the antivirus program is up-to-date. This can be done by opening the security application’s user interface and examining its version number and settings.
Finally, once all these steps have been taken, users should update any outdated virus definitions within the antivirus program and ensure regular scans are performed. If there are still issues with slow performance after these steps have been taken, further investigation may be necessary to identify what could be causing the problem. With these steps completed, users can feel confident that their computer has adequate protection against potential threats while enjoying improved system performance speeds. Moving forward, disabling the super fetch service may provide an additional boost in performance speed for Windows 10 users.
Disable Superfetch Service
Over time, Windows 10 machines can experience a decrease in performance. This is often due to the Superfetch service, which runs in the background and uses system resources. It is essential to know how to disable this service to improve the performance of Windows 10 machines.
The first step is to open Task Manager by pressing Ctrl+Alt+Del on the keyboard. Then select ‘Task Manager’ from the options that appear. Once Task Manager has opened, select ‘Services’ from the menu at the bottom of the window. This will bring up a list of services on your computer, including Superfetch. Right-click on Superfetch and select ‘Stop’ from the dropdown menu that appears. This immediately stops the service and frees up system resources for other tasks.
It is important to note that disabling Superfetch may have some adverse effects on your computer’s performance, such as slower application launch times or decreased responsiveness when switching between different programs. However, these effects should be minimal and outweighed by the improved overall performance of Windows 10 machines due to disabling Superfetch.
With Superfetch disabled, users may want to consider upgrading their RAM to improve their computer’s performance further.
Upgrade Ram
A RAM upgrade is an essential measure for improving Windows 10’s performance. As the saying goes, ‘time is money’, and this adage could not be more accurate regarding computers. Boosting the RAM of a system can significantly improve its speed. This can be done by simply accessing the computer’s settings and adding more memory chips.
An outdated or inadequate RAM can cause sluggishness in applications and programs and frequent crashing or freezing of the system. Another benefit to upgrading the RAM is that it allows for smoother multitasking with fewer glitches or interruptions. Moreover, it enables users to access large files faster and run more complex software without issues.
Generally, a good rule of thumb is to have at least 8GB of RAM for basic operations like web browsing and office work, 12GB for moderate gaming or photo/video editing, and 16GB for heavy gaming or serious video editing. Those who want maximum performance should opt for 32GB or even 64GB, depending on their needs. Ultimately, upgrading one’s RAM can offer a significant boost in terms of performance while providing peace of mind that the system will remain stable and reliable in day-to-day usage scenarios.
Frequently Asked Questions
What Is The Minimum System Requirement For Windows 10?
Microsoft Windows 10 is an operating system for personal computers, tablets, and other devices. Specific hardware requirements must be met to ensure that this system runs optimally. The minimum system requirement for Windows 10 is a processor with a minimum clock speed of 1 GHz or higher, 1 GB RAM for the 32-bit version and 2 GB RAM for the 64-bit version, 16 GB available hard disk space for the 32-bit version and 20 GB available hard disk space for the 64-bit version, and a graphics card with DirectX 9 or later with WDDM 1.0 driver support.
Users must familiarise themselves with these minimum requirements to ensure optimal performance of their Windows 10 device. Specific software applications may require additional hardware specifications to run effectively on a machine running Windows 10. Furthermore, it should be noted that some older hardware versions may not be compatible with the new operating system.
By understanding the minimum system requirement needed to run Windows 10 effectively, users can make informed decisions about whether or not their current device meets these criteria. Additionally, they can explore options such as upgrading their existing hardware or purchasing a new device that meets the requirements to improve their Windows 10 experience.
How Do I Check If My Drivers And Software Are Up To Date?
Keeping hardware drivers and software up to date is critical to maintaining Windows 10’s performance and security. While one might think that this process is tedious and time consuming, several built-in tools make it easy to keep drivers and software up to date.
Windows 10 includes an automatic update feature that checks for new updates regularly and downloads them in the background. This ensures that users can always access the latest updates containing essential bug fixes, security patches, and performance improvements. Windows 10 includes a tool called “Device Manager”, which can manually check for driver updates. It is also possible to use third-party software such as Driver Booster Pro or Snappy Driver Installer to download and install driver updates automatically.
For the most part, keeping drivers and software up-to-date is relatively straightforward; however, it should be noted that some updates may cause compatibility issues with specific programs or hardware devices. In these cases, rolling back the update or uninstalling it may be necessary to restore regular system operation. Despite this potential risk, users should not hesitate to update their drivers and software—especially if they notice any signs of sluggishness or instability in their system’s performance. Updating regularly will help ensure that Windows 10 remains secure and runs smoothly for years to come.
What Is The Maximum Ram Upgrade I Can Do On My Pc?
When it comes to improving the performance of a PC, one of the first steps is to determine the maximum RAM upgrade that can be done. This is because RAM upgrades often improve computer speed and overall performance significantly. The amount of RAM that can be upgraded varies depending on the make and model of the machine, as well as its operating system and other hardware components.
To determine the maximum RAM upgrade available for a particular PC, it is crucial to first consult with the manufacturer’s documentation. This will provide more detailed information about what type and size of RAM modules are compatible with a specific make and model. Additionally, many manufacturers have websites offering comprehensive technical support resources, including guides and tutorials on determining appropriate RAM upgrades for a given machine.
Once an individual has identified what type of RAM module is needed for their PC, they can purchase the appropriate memory module from an online retailer or local store specialising in computer components. It is also essential to understand any limitations regarding installing additional RAM into a system; some systems may not be able to handle extensive memory upgrades or may have compatibility issues with certain types of memory modules. In such cases, it may be necessary to consult a professional computer technician to ensure all requirements are met when upgrading the system’s memory capacity.
By taking these steps and understanding their own machine’s limitations, individuals can maximize their system’s potential by upgrading its RAM capacity to improve its overall performance.
How Do I Delete Temporary Files From My Computer?
Almost every computer user encounters temporary files at some point in their journey. According to a survey conducted by PC Mag, around 90% of all Windows users have experienced difficulties with temporary files taking up unnecessary storage space. Therefore, it is crucial to know how to delete these files to improve the performance of your PC.
The first step towards deleting temporary files is identifying their locations. Identifying the location of temporary files can be done manually or with the help of third-party applications like CCleaner, which allow you to search for and delete multiple types of temporary files from your computer at once. After identifying the location, selecting the relevant file(s) and deleting them permanently is necessary.
For those not tech-savvy enough to use third-party applications, there are other ways to delete temporary files, such as using the Disk Cleanup tool that comes pre-installed with Windows 10. The Disk Cleanup tool helps you free up disk space by finding and deleting unnecessary system junk, such as temporary internet files, offline web pages, and old system logs. It also allows you to select specific types of files you want to remove from your hard drive.
No matter which method you choose for deleting temporary files from your computer, it is vital always to take a backup. Some essential system files may also be deleted if not carefully handled. Once you finish this process, you will experience an overall improved performance on your PC due to freeing up disk space and increasing system speed.
How Often Should I Check My Antivirus Protection?
Regularly checking antivirus protection is an important step to ensure computer security. By doing this, users can be sure that their data and system are well-protected against any potential malicious threats. Antivirus protection can also help prevent viruses, worms, spyware, and other malicious software programs that can cause harm to a computer’s operating system and files stored on it.
Given the potential risks involved with not regularly checking antivirus protection, it is crucial to do so at least once every week. This helps ensure that the computer runs smoothly and that any recent updates or patches have been applied. Furthermore, checking antivirus protection regularly can allow users to detect suspicious activity on their systems before it becomes a significant problem. For example, if new virus definitions are released or any malware or viruses have been identified on a user’s system, they can take action quickly.
Users must understand the importance of regularly checking their antivirus protection to keep their systems secure and running properly. Doing so will help them protect their data and avoid potential security threats while ensuring their computers are running optimally. Additionally, taking these measures helps protect against identity theft and other forms of cybercrime, which could lead to further problems.
Conclusion
It is essential to ensure that a computer meets the minimum system requirements for Windows 10 to achieve optimal performance. Checking that drivers and software are updated can help provide a more consistent user experience. Furthermore, it is beneficial to determine the maximum RAM upgrade possible for one’s PC, as this can improve performance. Additionally, deleting temporary files from the computer regularly helps eliminate the machine’s unnecessary clutter and optimize speed. Moreover, antivirus protection must be checked frequently to safeguard against malicious attacks that can cause slowdowns.
In conclusion, improving the performance of Windows 10 requires taking steps such as making sure the minimum system requirements are met, keeping drivers and software up to date, determining the maximum RAM upgrade possible on one’s PC, deleting temporary files regularly, and checking antivirus protection often. These measures help ensure the smooth functioning of the operating system and enhance user satisfaction when utilizing Windows 10. Furthermore, taking these steps will help one enjoy an improved overall performance on their device running Windows 10.

